Types of table saw blades

A table saw is one of the most versatile and important tools in a woodworker’s shop. And having a quality blade on the table saw can help a craftsman turn out the best product possible. But did you know not all table saw blades are made the same?

There are several different types of table saw blades that are suited to a variety of different cuts. Read on to learn more about table saw blades and what goes into choosing the right one for the job.

Table Saw Blade Anatomy

Before we talk about different types of table saw blades, let’s explore the basic anatomy of a table saw blade. Table saws have five basic components:

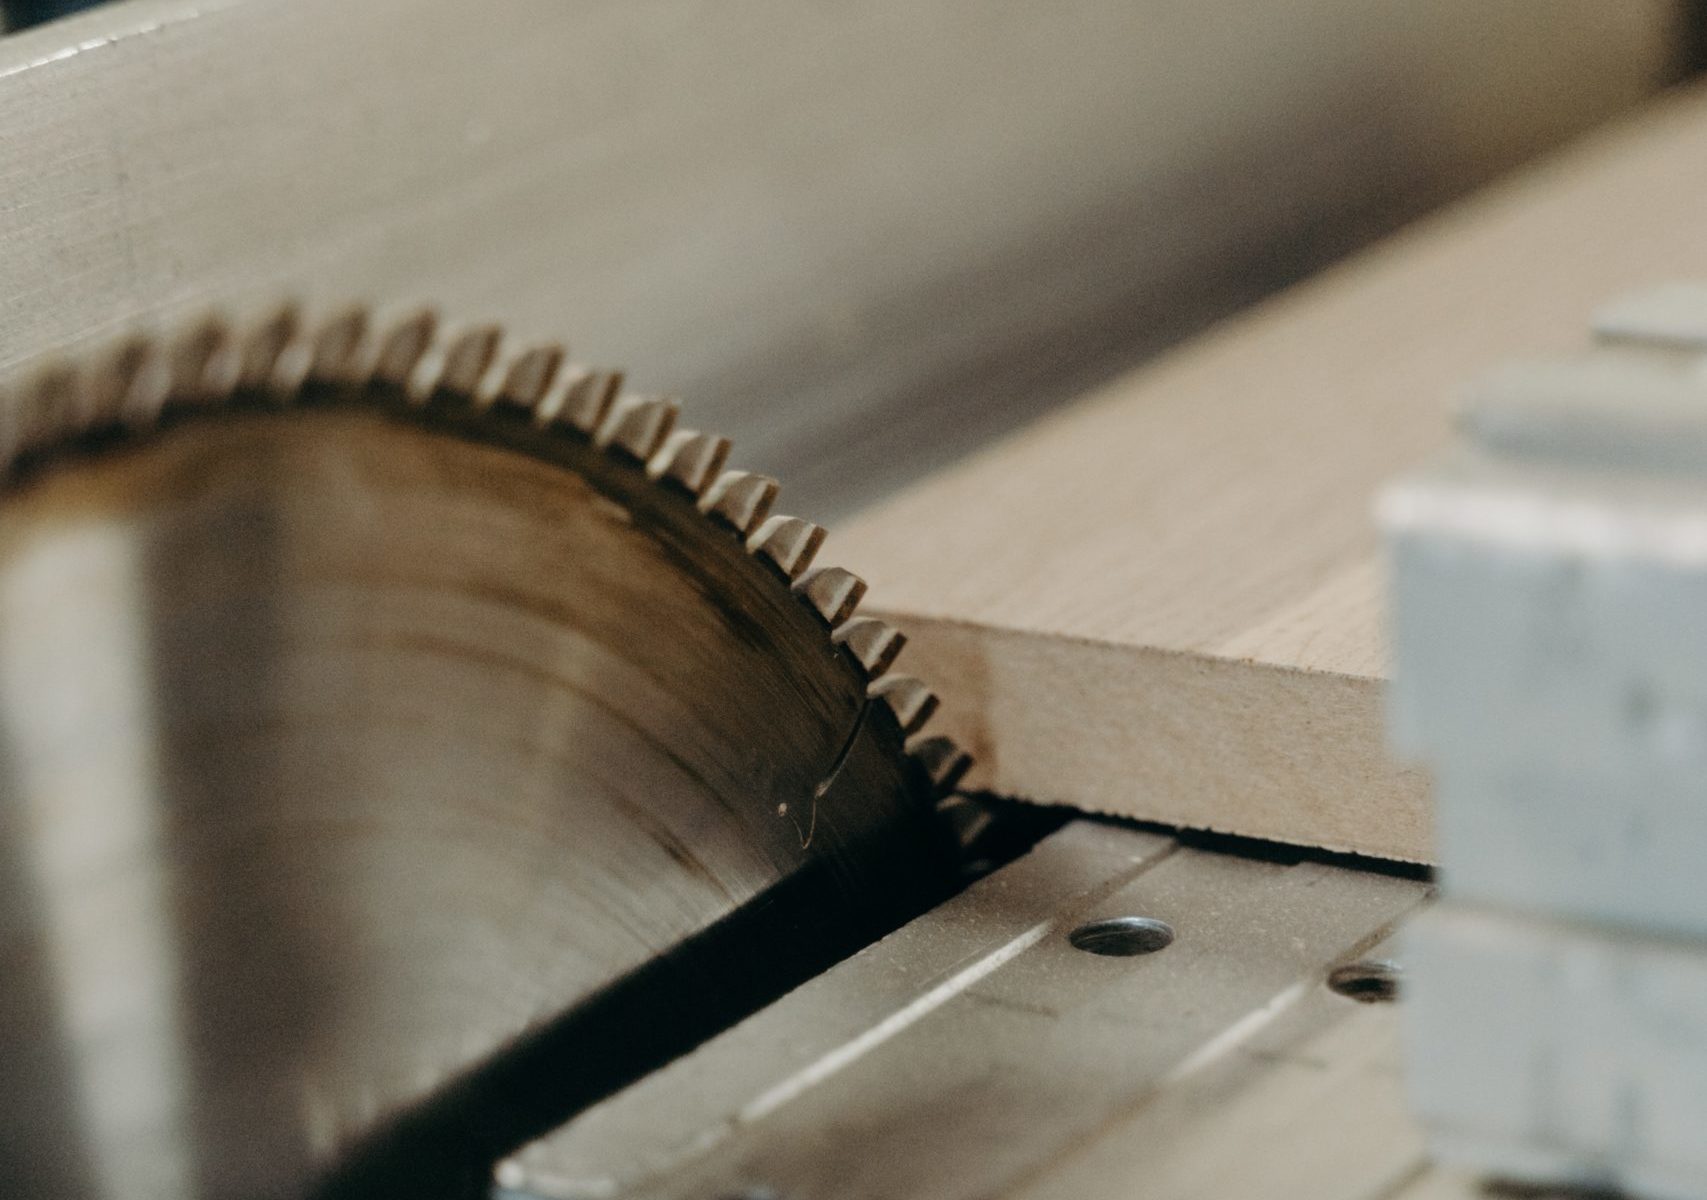
    • Steel plate – This is the main body of the saw blade. Spread throughout the steel plate are a variety of cuts designed to help the blade expand safely as it heats up due to the friction of the cut, as well as to reduce the noise and vibration the blade puts off.
    • Carbide teeth – These are the teeth that do the actual cutting. The curved space between the teeth is called the gullet and helps to remove wood shavings that come off as the blade cuts through the material.
    • Arbor hole – This is the hole in the center of the blade where the blade mounts onto the table saw.
    • Kerf thickness – This is a measurement of how much material is lost to the thickness of the blade itself during the cut. Standard kerf thickness for a table saw blade is 1/8”, which means if you cut five inches off a six-inch piece of material, the piece you’ll have left over will only be 7/8”, not a full inch.
    • Coating – Most table saw blades have some type of coating (often Teflon) designed to help the blade move through the wood easier and keep the heat down.

No matter what else changes on a table saw blade, you can always find these basic components.

Types of Blade Teeth

When you start comparing specific table saw blades, the biggest difference among them is the type of teeth they have. There are four basic types of teeth a table saw blade can have: flat top grind, triple chip grind, alternate top bevel, and high angle alternate top bevel.

    • Flat top grind (FTG) – These teeth have flat tops on them, which helps them to hold an edge well. They work well for ripping through wood quickly, but they can leave marks on the material.
    • Triple chip grind (TCG) – These teeth are beveled on the corners, which helps to reduce marks on the material.
    • Alternate top bevel (ATB) – The teeth on these blades are beveled on alternating corners, which helps to create a cleaner cut. The steeper the bevel on the teeth, the cleaner the cut you’ll get.
    • High angle alternate top bevel (Hi ATB) – These teeth have the same alternating bevel as standard ATB blades, but the bevel is very steep. This creates an incredibly clean cut, but they do dull very quickly.

You can also get table saw blades that have a combination of different types of teeth. This helps them to be suited to more than one purpose or to offset some of the downfalls of the various teeth types.

General Purpose Blades

After types of teeth, table saw blades are usually categorized by what sort of cuts they’re used for. As you might guess from the name, general purpose blades can be used for a variety of different cuts. As a rule, they have forty to fifty teeth on them, often ATB or Hi ATB teeth.

Combination Blades

As we mentioned earlier, combination blades can include a variety of different types of teeth, although they usually have mostly ATB teeth. Mixed in will be either some FTG or TCG teeth, depending on what the craftsman plans to use them for. They often have between fifty and sixty teeth.

Ripping Blades

Ripping blades are designed to cut wood along the line of the grain (called a rip cut). These blades usually have FTG or ATB teeth, and they often have between twenty-four and thirty teeth. These qualities help the blade move through the material quickly.

Crosscut Blades

Crosscut blades are engineered to cut wood across the grain of the wood (called a crosscut). Since the wood tends to fray more on crosscuts, these blades usually have ATB or Hi ATB teeth to create cleaner cuts. They also usually have between 60 and 96 teeth, providing even more precision.

Dado Stacks

Dado stacks are a specialized type of table saw blades designed for very thick cuts. Dado joints use a channel cut into the face of a piece of wood. You slide another piece of wood into that channel perpendicular to the original piece of wood.

Dado stacks are composed of multiple blades – two outside blades with ATB teeth and inner blades with FTG teeth. All of these blades go on the table saw at once, allowing the craftsman to cut the channel needed for a dado joint in one go. They’re a specialized tool, but they’re hard to beat when using this type of joinery.

Throat Plates

Hand-in-hand with table saw blades, we have throat plates. These accessories fit into the slot in a table saw where the blade comes up. They help to close the gap around the blade and prevent debris and wood chips from lodging in the workings of the saw.

There are different types of throat plates you can get, depending on the blade you’re using and your particular needs. For instance, a dado blade will obviously need a wider slot in the throat plate than a standard blade. And zero clearance throat plates that sit very close to the blade can help to create a cleaner cut on the material.

Get Expert Advice on Your Project

Choosing the right table saw blade requires a craftsman to consider a number of factors, including the kind of cut they’re making and how clean it needs to be. The four different tooth types and the various combinations you can make with them create blades that are suited to different types of cuts.

When you need a piece of fine furniture crafted with utmost attention to detail at every stage of the building process, reach out to us at The Handsome Home. We’re dedicated to bringing your home décor visions to life. Contact us today so we can talk about your next project.

Wood movement

Did you know that wood moves, even after it’s cut down into boards? Working with lumber is somewhat of an art form, as the craftsman must work with the lumber and its movement to create a long-lasting, beautiful piece of furniture. Below we’ll discuss how and why wood moves, and what can be done to minimize it and make the movement work with a furniture piece.

Tree growth

A tree grows by drawing nutrients and water from the soil underneath it. To do this, trees use natural channels within the wood called capillaries. These capillaries are shaped like straws and run vertically throughout the tree.

Water and nutrients flow through the capillaries, to every leaf and branch on the tree. As water evaporates from the leaves, a negative pressure is created within the capillaries, creating a small vacuum. This vacuum allows the tree to draw water upwards from the soil, carrying it to the very top.

Moisture affects on lumber

You may be wondering why I just explained how a tree grows. Well, this knowledge will help understanding why wood moves, even after it’s been cut down. As you learned above, the capillaries are responsible for moving water throughout the tree.

Even after a tree has been milled, these capillaries still do their job of moving moisture. Even if the cells of a tree are dead, these capillaries only rely on air movement to transfer water. And it may not seem like there’s much water in a tree, but trees can be more than 50% water!

Newly milled lumber will begin to dry out as all the moisture in the tree begins to evaporate, by exiting through the capillaries. As it dries, the wood shrinks. If one side of the wood is drying faster than the other, the drying side begins to shrink, while the other side(s) don’t. This imbalance creates tension within the wood and it can begin to move in all sorts of undesirable ways; twisting, cupping, bowing, etc.

In addition to moving due to moisture, wood can also move because of stresses within the wood. The inner most part of a tree trunk is under immense pressure, as the outer layers press inward on it as the tree grows. When milling the tree into lumber, this pressure gets released. The wood can twist and bend in different ways, based on where the pressure is within the wood.

Kiln drying lumber

To reduce the amount of movement caused by moisture, most companies who sell lumber will dry their wood in a kiln before selling it. The kiln works like an oven that heats the wood. The temperature, humidity, and air circulation are carefully controlled. This helps remove moisture and relieve pressure slowly, as to not warp the lumber.

An alternative to kiln-drying lumber is air drying. In fact, you can air dry lumber at home. The biggest downside to air drying lumber is the amount of time it takes. While a kiln can dry an oak board in 30 days, it’s recommended to air dry lumber for one year per inch of board thickness.

It’s also important to properly prepare and store the lumber for air drying. To slowly release the moisture as a kiln does, the ends of the boards must be sealed. There are special sealants, made specifically for this purpose, or you can use latex paint as well. If the ends are not sealed, moisture will evaporate from the ends of the boards much quicker than the center, and they will crack.

If air drying lumber, the boards need to have the same amount of airflow on all sides. To do this, small boards (usually an inch thick) called stickers are placed between the stacked boards. The empty space between boards helps air move all around the boards as the moisture evaporates.

Direction of wood movement

Believe it or not, wood moves different amounts throughout different parts of the board. For instance, a standard 12 inch wide board will move the most along its width, while the thickness and length will move the least. When designing a piece of furniture, it’s important to account for these different rates of change and how they’ll exert pressure on surrounding joints.

Lumber also moves when it is placed in different environments. When a piece goes to a more humid climate, the wood swells. This swelling can cause moving parts to no longer fit or work correctly. The opposite holds true for drier climates. Wood will shrink in a drier climate, due to moisture loss. This can also lead to inoperable moving parts and gaps.

Ways to reduce wood movement

The best way to reduce the movement of lumber is to have it kiln dried. It’s also best to not use wood that was close to the center of the tree trunk, as there will be more internal pressure here, as mentioned above.

It’s never a good idea to try to restrain wood from moving. The forces exerted are much larger than would be expected, and the wood will eventually move the way it wants. This sudden release of force will more than likely damage the piece of furniture.

Designing for wood movement

Despite all the different ways that wood continually moves, it is possible to design a piece of furniture in a way that the movement and structure work together in harmony. When constructing a wide tabletop from many panels, it’s important to orient the grain on one panel opposite of the grain on the adjacent panel. This helps any movement balance out or offset each other.

It’s also important to not restrain the tabletop panels from expanding across their width. To do this, breadboard ends must be used. This style of joinery connects all the panels to the end piece, which is oriented perpendicular to the panels. Pins are made from wood dowels, and these are inserted into slots in the end piece, which allow the panels to expand and contract without breaking.

Attaching a finished tabletop to the base must also allow for movement. One of the most common ways to do this is to attach the top with z-clips or figure 8 clips. These types of clips hold the top firmly against the base but can swivel as the wood expand and contracts.

As you can see, wood moves a lot more than you probably realized. This movement creates challenges when designing a piece of furniture. If you have questions about what you’ve read or if you’d like us to take the guesswork out of your project, send us a message today and we would love to design and build a custom piece of furniture just for you!

How to hang wall art

Getting a new piece of wall art is always exciting. But sometimes, that excitement is replaced with frustration when it comes time to hang it on the wall. If your new art doesn’t have hangers, you need to first figure out which type of hanger to use. Next, make sure the hanger and the wall can support the weight, and then gather all the tools needed to hang it. Read on below to learn about the different types of hangers, how to secure them, and some tips to make the process easier.

Types of hangers

 There are many types of hangers you can use to display your wall art. Below, we’ll discuss some of the most common.

Sawtooth hangers

These hangers are small metal brackets, that have ‘teeth’ cut into one or both sides of it. The ends are smooth and bent at 90 degrees; they are then driven into the frame (or secured with nails or screws). These small ‘legs’ at the end leave a small gap between the hanger teeth and the frame. The screws or nails in the wall rest between the teeth of the hanger. This secures the piece and doesn’t allow it to move side to side.
These types of hardware are most often found on framed art found at large retailers. Sawtooth hangers are relatively strong, but their strength depends on how they’re attached. They’ll be able to support less weight if they only have pointed ends and are hammered into the frame. A hanger that’s nailed or screwed into the frame will be able to hold more weight.
These are also easy to add yourself if your art doesn’t already have hangers. One drawback of these hangers is that they do protrude a little from the back of the art, leaving a small gap between the piece of art and the wall.

D-rings

D-ring hangers are a thick metal wire that’s bent into a D-shape and then attached to a baseplate. The baseplate has holes which attach the hanger to the frame. The D-ring can swivel, allowing it to slip over the head of a screw or nail on the wall. Once hung, the D-ring will lay flat against the frame.
As with sawtooth hangers, D-rings will leave a small gap between the frame and the wall. Another thing to consider is the weight of your art piece. There are different sized D-ring hangers, which are rated for different weights.

Wire

Used in tandem with D-rings, wire is often used to hang art on the wall. To do this, a piece of steel wire is strung between the two D-rings and secured to each ring. Either one or two screws are attached to the wall, and the wire sits on top of the screws. The wire method of hanging allows easy adjusting to achieve level.

Drywall hooks

Unlike the other hangers we’ve talked about so far, drywall hooks mount to the wall, rather than the art piece. Drywall hooks are usually formed from a strip of metal. The metal is a u-shape and has holes where nails are used to attach it to the wall. The hanger on your art, or the frame itself rests in the valley of the u-shape on the hook.
A lot of drywall hooks have the nail holes angled, so that the nails have a slight downward angle on them in the wall. This helps add strength to the hanger and makes it easier to hammer in the nail. Unless the hook has a recessed area to lay in behind your art, this hook will also leave a small gap at the wall.

Keyholes

Keyhole hangers are one of my favorite hanging methods. Traditional keyhole hardware is a metal bracket, with a slot in the center, that is wider at one end. The screw in the wall slides into the wide end of the bracket, and the art is then slid down, so the screw head now sits in the narrow end of the slot. The head of the screw is now wider than the slot, which prevents the art piece from moving or falling off. These metal keyhole hangers can be mounted on the surface of your piece, or they can be recessed into the frame, which allows the art to lay flat against the wall.
Besides the metal hangers, keyholes can also be made into the frame of a piece, eliminating the need for extra hanging hardware. To do this, the manufacturer will use a router to cut a slot into the frame, which is the same wide-to-narrow shape as the metal hanger. This built-in slot has great strength since the screw rests within the frame material itself. Using this method, the art will sit flush against the wall, leaving no visible gap.

Cleats

The last type of hanger to talk about is a cleat. A cleat hanger is made up of two long, metal brackets. One bracket attaches to the frame of the art piece, and the other attaches to the wall. The bottom of the frame bracket is bent slightly away from the frame, and the top of the wall bracket is slightly bent away from the wall. The bottom of the frame bracket rests in the top opening of the wall bracket.
This type of hanger is good for heavy items, since it can be secured to the wall in many locations, along the length of the bracket. If not recessed into the frame, cleats can also leave a small gap between the wall and the art piece.

Hanging considerations

When deciding where and how to hang an art piece, there are some important considerations. First, consider the construction and materials of your wall. Next, determine how the art piece is built, and the weight of the piece. Also, make sure that the types of hangers on the piece are sufficient for the weight. They should also be attached in a strong location of the frame and not too close to an edge or corner.
If the piece being hung is heavy, it’s best to secure the wall hanger to a stud. This way, the art is secured to a solid piece of wood, rather than drywall or plaster alone.
If a stud isn’t needed, then almost any of the above hangers will work for drywall surfaces. Just be sure to use a plastic anchor in the drywall, before inserting the screw. The anchor will expand behind the drywall when the screw in inserted, giving extra strength and support.
Most homes older than the 1950s will have plaster walls. If you have this, your hanger choices are more limited. If you can secure the wall hanger in a stud, this is the best option. A long cleat can help span two studs and make it easier to hang a large piece.
If you can’t find a stud or there’s no stud in the ideal location, the best hanger I’ve found is the drywall hooks. If you find that the plaster breaks when hammering in the nails, drill small pilot holes first and cover the wall with tape while drilling. This will help reduce breaking. The angled nails and large surface area against the wall help to securely hang even large pieces on plaster walls.

Hanging tips

When hanging a new piece of art, it’s important for it to be level. While a traditional level (historically called liquor sticks) can be helpful, a laser level makes the job easier; especially if you have a lot of pieces to hang. You can set up the laser level to shine a laser line across the room, so you can quickly hang all your pieces at the same height and perfectly level.
With smaller pieces, a piece of painter’s tape or masking tape can be helpful. Simply put a piece of tape across the back of your piece and mark the holes or hangers on the tape. Carefully remove the tape and stick it to the wall where you want to hang the art piece (don’t forget to check level!). Drill the holes on the marks and hang your piece.
If dust is a concern when drilling holes in the wall, stick a post-it note underneath the drilling location and fold it in half horizontally. This creates a small valley which catches most of the dust. When you’re finished drilling, peel off the post-it and throw it away!
If you need custom framing for any of your artwork, reach out to us. We’d be glad to discuss your custom woodworking project today!


Furniture design considerations

If you’ve ever designed a piece of furniture yourself (or tried to), you may know how difficult it can be. To make that piece work exactly as intended and so it will last for years, there are dozens of things to consider. Continue reading below to find out the basics of designing furniture.

How will it be used?

One of the first things to consider about a new piece of furniture is how it will be used. Since nearly all furniture pieces serve a function, we need to think about what that function is and how it could affect the design. If we’re designing a bed, for instance, that purpose is already pretty well-defined because the purpose of a bed is nearly universal.

If what we’re designing though is, let’s say a bar, then the function may vary. One person may only want a bar to hold and store drink bottles, while another may want to have a sink and mini fridge within the bar. Now, we need to add in holes for a sink, plumbing, air circulation for the fridge, and a waterproof finish.

Where will it be used and stored?

The location of a piece of furniture plays a big part in the design as well. For example, it’s best to not use miter joints on pieces that will be outdoors, as the fluctuating temperature and humidity often causes them to gap. A tough finish will also be needed for outdoor pieces, to stand up to the sun’s UV rays and the moisture.

Even if a piece is indoors, location is still important. A bookshelf in a child’s room could probably be built with a less expensive species of wood than a dining table because appearance is not quite as important for the child, and it will likely see heavy use. Furniture near (or in) a kitchen or bathroom will need to be more resistant to moisture.

How big does it need to be?

While some design choices can be overlooked, this is one most people remember because it is fundamentally important that your piece fits where it’s needed. The most obvious measurements needed are the length, width, and height. The finished piece needs to comfortably fit in its new space and not feel overly large or small.

Joints, hardware, and accessories are another important consideration when designing your furniture. The overall dimensions may be figured out, but you also need to think about how your piece will be built and joined together. If you use a pre-manufactured metal bracket to assemble your table sides to the legs, the legs and sides need to be wide enough to accept the bracket.

You also need to determine sizing for hardware, such as hinges, rollers, latches, or knobs. Not only should the receiving board be big enough for the hardware, but it should also be comfortable for the end user to operate. Lastly, make sure to account for dimensions of other accessories. If a slot is being put into an end table to hold remote controls, make sure to account for the size of the remotes when designing.

What type of wood should be used?

The earlier sections about how and where a piece will be used can affect this decision as well. For larger and more visible pieces, it may be desirable to use a nicer species of wood, like walnut, oak, or maple. These woods will increase the cost, but they are usually more durable than cheaper woods and they are visually pleasing.

Certain species are also better suited to some pieces of furniture more than others. While oak can be used for a dining table, it will require extra preparation and finishing because oak wood has very large pores. This means that the space between the grain of the wood is much larger than other species. In order to make sure food or other debris doesn’t get trapped in the pores, extra sanding will be needed or a pore filler can be used.

In addition to color, durability, and grain, the way a piece of  wood was cut can also affect the end product. The direction of the grain within the piece of wood affects the stability and strength of a piece and should be carefully considered during the design stage.

What types of fasteners will be used?

When designing a piece, it’s important to think about how it will be built and how each piece will be joined to the others. There are countless options, such as screws, nails, dowels, biscuits, glue, mortise & tenon, dado, miter, etc. Not only should your design be easy to build, the pieces should be sized appropriately to prevent exposed fasteners and structural weaknesses.

When planning your joinery, the use and location should also be a factor. Certain joints do better in certain conditions than others. Choosing the right method will ensure your piece will last for years.

Creating a design

Now that you know the basics of designing furniture, you can start actually designing your piece. Some people like to use a pencil and paper to physically sketch their piece, but I prefer to use a 3D computer design program called Sketchup. Even when accounting for all of the above, you will still likely encounter some small problems and will need to modify the design slightly.

Hopefully you now have a better idea about how to design a piece of furniture that will be beautiful, durable, and functional. If you have any questions, please feel free to contact me  or comment below. And if you’re looking for a well-designed, handcrafted piece of furniture, send me a message today and let’s make your vision a reality!

Types of wood joinery

Have you ever noticed how some of your furniture is assembled differently from others? Perhaps some has legs that are bolted on, while others have slots for the legs. Or maybe you’ve noticed a different type of joint in your cabinetry (the dovetail, which we’ll talk about later). There are many factors that go into the decision of how to join different pieces of lumber together. You can read about some of those reasons here, and learn more about some of the most common types of wood joinery.

Butt joint

A butt joint is when two pieces of wood are joined at 90 degrees, or perpendicular, to each other. These joints can be fastened with nails, screws, dowels, biscuits (small football shaped inserts; you can read more about these below), or glue. If only glue is used, the joint could become weak if not properly prepared, because the end of a board will absorb most of the glue and will not leave much on the surface to adhere to the perpendicular piece. Because of its simple, rough aesthetic, a butt joint is a good choice for a project in which appearance is not a concern; or when a simpler, perhaps rustic, look is desired. If you have viewed our gallery, you may have seen a butt joint in the reclaimed wood cabinet project.

Miter

A miter joint is similar to a butt joint, except that the two ends being joined are cut at 45 degrees. These joints are much more aesthetically pleasing, which is why you’ll often see them used in furniture and picture frames. Miter joints should generally not be used outdoors though, since the wood movement caused by weather tends to create gaps. In terms of joinery, miter joints tend to be weaker than many other types of joints, although they can be reinforced using other methods. You can view a miter joint in the barnwood coffee table I previously made and the custom shell display case.

Half-lap

A half-lap joint is when two boards overlap at a corner. At the corner where they overlap, half the thickness from each board is removed, so that when laid on top of each other, they still equal the same board thickness. The overlapping area is then secured with glue, screws, nails, or pins. These joints have a similar appearance to butt joints, but are much stronger, because of the large surface area that overlaps each board. A different type of half-lap joint is a cross half-lap. In this joint, the boards cross over each other diagonally, so the overlapping sections are made in the center of the boards, rather than the ends.

Dovetail

Dovetail joints are very common in quality woodworking. In this joint, there are pins and tails. At the end of one board, the pins are cut. These are finger-like protrusions from the board, which have their vertical sides cut at a slight angle. The other board has tails cut into it, which are notches that the pins fit into. A dovetail joint is most commonly used in drawers since they are very durable and do not come apart easily. The use of jigs has made it easier to create these, and therefore they are becoming increasingly common. There are also many other variations of dovetail joints, such as half-blind dovetail, secret mitered dovetail, and secret double-lapped dovetail.

Mortise & tenon

A mortise and tenon joint is essentially a slot-and-peg system. The tenon is a rectangular tab that is cut at the end of a board. This tenon is cut from the same material as the rest of the board, which lends to this joint’s strength. The mortise is a hole in a different board, which the tenon will be slotted into. The mortise is the same size as the tenon, and the two should fit together snugly. This type of joint has been used for thousands of years, as a peg can be added through both the mortise and tenon, creating a mechanical joint (before the invention of screws, nails, and glue).

Bowties

A bowtie is a type of joint most commonly used when a piece of wood has begun to split or crack. A lot of times, wood in its natural state is highly desirable, including any cracks that may be in the wood. While these may be aesthetically pleasing, it is important to stabilize the split in order to maintain the integrity of the rest of the piece. To do this, the craftsman will first cut out a piece of wood in the shape of a bowtie. Then, that exact shape is carved out of the piece of wood that is splitting. The bowtie is then inlaid into the split wood and glued in place. The bowtie straddles the split, giving strength to the joint and not allowing the split to expand any more.

Dowels & biscuits

Dowels & biscuits are joinery techniques which you should almost never be able to see in a finished piece. That’s because both of these methods involve joining pieces together from within the lumber. Dowels are short, round pegs that are inserted into holes that have been drilled into the wood. Only half of the dowel length is inserted into the first hole. The other half will be used in the adjoining piece. A matching hole is drilled in the other piece of wood to be joined, and then the other end of the dowel is inserted into the adjoining hole. Biscuits use a similar method of joining, except rather than a hole, a slot is cut into the lumber. Because these slots are wider, small football shaped pieces of wood (biscuits) are inserted and glued. There are some exceptions which you will see dowels or biscuits in a finished piece. Sometimes, the craftsman will use these as accents, on the joining edges or corners of a piece.

How to identify quality woodwork

Hand plane with wood shavings

It can be challenging to tell if a piece of furniture is well-made or not, especially if you’re not familiar with woodworking and how these pieces are built. But when you invest money in a new furniture piece, you want to make sure it’s going to last for years to come. So what are the telltale signs that furniture is made with quality materials and techniques?

There are several qualities you can look for when shopping for quality furniture. Read on to discover how to identify a quality piece of woodwork.

Types of Material

One of the most important factors of quality in woodworking is the material used. Many people simply don’t realize how many different types of wood there are. There are hundreds of species of wood, all with different characteristics.

Some of the more common species are oak, maple, walnut, pine, and mahogany. Every wood species falls into one of two categories: softwood or hardwood.

Despite how the name sounds, the physical density (hardness) of the wood is not what determines whether it’s a hardwood or a softwood. To determine that, we must look at the seeds of the tree.

Hardwoods come from deciduous trees – that is, trees whose leaves change colors and fall off in autumn. The seeds from these trees have a protective coating, which can be a hard shell, a tough skin, or even fruit.

Softwoods come from coniferous trees, which keep their needles or scaly leaves year-round. These seeds have no coating on them and are exposed to the elements once released from the mature tree.

Now that we’ve discussed the different types of wood, we can talk about the different forms they come in. The most common forms of lumber are sheet goods and dimensional lumber, although live edge slabs have been gaining popularity in the recent years.

Sheet Goods

Sheet goods are usually sold in four-foot by eight-foot sheets and vary in thickness. The types of wood found in this category are plywood, oriented strand board (OSB), and mechanically distributed fiberboard (MDF).

Plywood is made by gluing together thin sheets of wood, which are shaved from the tree while its main trunk is rotated. The orientation of each sheet in the plywood is perpendicular to the one below it.

This alternating pattern helps to give the plywood strength and resist movement within the wood. These characteristics make plywood an excellent choice for cabinets, desks, bookshelves, etc.

OSB and MDF are two more types of sheet goods that are fairly similar. OSB stands for “oriented strand board.” This type of board is made by pressing extra-large wood chips together and then infusing them with glue.

MDF (mechanically distributed fiberboard) is made by pressing together extremely fine wood particles and infusing them with glue. This results in a much smoother board, but it is more susceptible to damage from water. Almost all MDF furniture is covered with a veneer to protect it from water and to enhance the visual aesthetic.

Veneer is a very, very thin sheet of wood, typically measuring 0.6mm thick. It comes in a variety of colors and wood species and gets glued to the plywood or MDF substrate. Veneer can also be made of plastic that’s made to look like wood.

Of all the sheet goods, standard plywood is the most commonly used type and arguably the highest quality. OSB is generally used in places where strength is not as crucial, and the visual aesthetic isn’t important. MDF (usually covered with veneer) is the cheapest, but is much easier to damage. It is often used in flat-packed furniture; that is, the furniture you assemble yourself at home. 

Dimensional Lumber

Dimensional lumber is always a single piece of wood, unlike the sheet goods. You can find dimensional lumber in dining tables, beds, shelving, picture frames, etc.

The most common size of dimensional lumber is a 2×4. Commonly made from pine, it’s standard practice to use these 2×4 boards to frame houses and other buildings, although dimensional lumber is used for much more than just this.

Dimensional lumber can come in many shapes and sizes, ranging anywhere from 1/8 inch to 4 inches thick; the width of these boards varies as well. Just like sheet goods, dimensional lumber comes in many different species, each with their own visual and physical characteristics.

The highest quality furniture and decor pieces use dimensional lumber, although there are some cases where plywood is actually the better choice. If in doubt about what is best, consult with your builder.

Live Edge Slabs

Live edge slabs are a unique type of lumber. Similar to dimensional lumber, these slabs are one piece of wood throughout, but the edges of the board are rough.

When the lumberyard cuts these boards, they leave the bark of the tree on the edges, rather than sawing the edges off square. Visually striking, these boards strike a balance between clean, modern furniture and the natural environment from which the wood came. Live edge slabs can be used to make dining tables, shelving, countertops, coffee tables, and so on.

Joinery

Joinery is the other factor that determines the level of quality in any particular piece of furniture or décor. Joinery refers to how the various pieces are fitted and fastened together. The following factors play a role when deciding which type of joinery is best:

  • How much weight or stress will be placed on the joint
  • The material type and its strength
  • Whether the piece will be indoors or outdoors
  • Whether the joint will be visible
  • The aesthetic design of the piece
  • Wood movement

Because so many factors affect the type of joinery used, it’s best to ask your builder or contractor which type of joints they will use and why. It’s also possible to request a certain type of joinery. There are many beautiful joints which can add to the beauty of a piece of furniture.

Finishes

Now that we’ve discussed the structural features found in woodworking, we can shift our focus towards the aesthetic aspects, such as finishes. A finish is of utmost importance when dealing with wood; it can help retain natural oils in the wood, prevent cracking or warping, and protect the surface from scratches and dents.

Most people are probably familiar with the most common types of finishes, such as stains, varnishes, and paints. But there are more finishes than just these, and each one has different characteristics that will need to be considered for each particular project. Let’s break these down below:

  • Wood stains
    • Can be water-based, oil-based, or gel-based.
    • Available in many different colors & sheens.
  • Wood finishes
    • Surface finishes. These dry in a clear film that sits on the surface of the wood and provide a higher level of protection than penetrating finishes.
      • Shellac
      • Lacquer
      • Polyurethane
      • Varnish
    • Penetrating finishes. These finishes soak into the wood, providing a more natural look and accentuate the wood grain.
      • Tung oil
      • Linseed oil
      • Danish oil

In most projects, a wood stain is applied first and then sealed with a finish. Using an appropriate finish will ensure that your furniture will last a long time.

Extra Features

I’ve often said that the final touches make the greatest impact. This holds true for a project’s extra features as well. The right features can take an average piece and turn it into a stunning piece of art.

Of course, hardware is a very important consideration for each project. Color is among the most important; builders can choose from silver, brushed nickel, bronze, black, and dozens more.

After color, the functioning mechanism must be chosen; for cabinets, there are more than eight types of hinges alone! There are also clasps and latches, sliders, and rotating spindles. With all the different options available and every project being unique, it’s a good idea to consult with your builder about which hardware is right for you.

The next step up from hardware is moving parts. Your project may have pieces that need to move. These can be doors, knobs, or maybe the entire piece itself needs to be mobile.

If your project needs to be mobile, it will need to incorporate wheels. These can be fully rotational or directional, depending on the needs of the customer. For doors, there’s the classic option of hinges, but you can also use rotating or sliding doors. More recently, folding doors have gained popularity.

The use of the piece is usually the most important factor when deciding which type of doors to use.

With the many technological advances within the last two decades, electronics are more frequently being integrated into furniture pieces. The simplest example would be lights. These are much easier to build into pieces now, due to their small size and ability to be battery-operated.

You can also incorporate other features such as electronic locks, wireless chargers, and more into furniture.

Conclusion

By examining the materials, joinery, hardware, and extra features on a piece of furniture, you can get a better idea of how well each piece is built and about how long it should last. Each material and finish has its place, and which ones you select will depend on your particular needs. Keep in mind that a lot of projects built using real wood will require some routine maintenance to prolong their lifespan and keep them looking like new.

If you have any questions about how to identify quality woodwork or about your own furniture and décor pieces, please comment below or contact us at The Handsome Home. You can view pictures of my past projects which showcase a lot of the features we talked about here. And if you need custom furniture created, contact us!